This is seriously impressive, well done. When you're finished I've got an entire main floor you can come do... it's in Canada though so you might need to take a bus or something.
THANK YOU. BECAUSE IT IS. i’ve impressed myself.
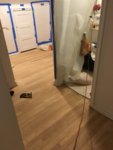
Thoes floors looks SOOOOOO much better!

How long did it take you? I'm thinking of doing this down the road with my new place
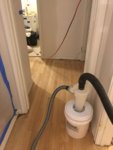
i’m still not done and i have used muscles i never understood before. mostly, somehow in my back/shoulders. you know that stretch where you extend your arm straight in front of you, and with your other arm, pull the straight arm across your body/shoulder blades? that stretch does something now! i always thought it was just fun because it didn’t hurt. now, it does!
Did you end up having to replace any boards? That’s the thing holding me back from starting this same nightmarish project. I have very similar floors, but there’s easily a dozen boards that need to be pulled and replaced. I have no idea how to do that.
Edit: ok, that site *is* amazing. There was a video and everything.
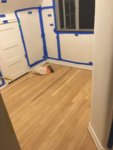
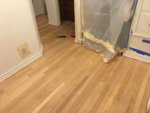
i did not. and thank god because fuuuuck that. but also - if you have to, you have to. there are some where the grain is super worn and too deep to sand. so i decided to thin some wood filler and fill it and so far, it’s worked. wood filler is usually absolute shit, but the timbermate that pete’s recommends i fucking phenomenal. you can thin it with water, mix colors, and apparently it lasts for fucking ever. i’ve smoothed our some boards already. i also bought 8 more today (i’ve used half of one 8oz jar), each a different color. the color it is when wet is not what it dries to, but what it will look like once it’s been sealed. so it’s mwant to match raw wood.
i don’t know why i’m writing all this aside from the fact that a bunch of people on amazon didn’t know that, and left bad reviews. but they were wrong. timbermate is badass. i want to wood fill everything. and i will.
also - pete’s explains the board replacement stuff. and i think you already found that video. and yeah, they’re awesome. like i wish i lived in st. paul awesome (fun fact: i’ve wanted to live there since i was like, 14. would consider it. still love los angeles, tho)


")